User Provisioning
The SCIM 2.0 protocol (RFC 7642, 7643 and 7644) is supported for automatic synchronization of users from IDM systems into UCS. UCS acts as the Service Provider, and the IDM system (Microsoft, Google, Oracle, etc.) acts as the SCIM Client. Alternatively, the built-in UCS synchronization can be used by means of the Sync plugin.
Verification of the IDM source is based on the UCS integration user and its assignment to the user accounts created
by the given IDM (the username of the integration user is stored in the user's metadata under the scim_source key). Users
who do not have this key in their metadata with a value matching the given username are not visible to the IDM. Thanks to
this feature, manually created user accounts in UCS are protected, and it is also possible to synchronize users from
multiple IDM sources (multitenant).
Microsoft Entra ID
Configure Microsoft Entra ID as follows:
- In UCS, create an integration user who will have Add and Edit permissions on the groups in which users are to be created, and note down their username and password. Users created via SCIM are placed into the UCS group in which the integration user is a member.
- Sign in to the Azure Portal.
- Go to Microsoft Entra ID.
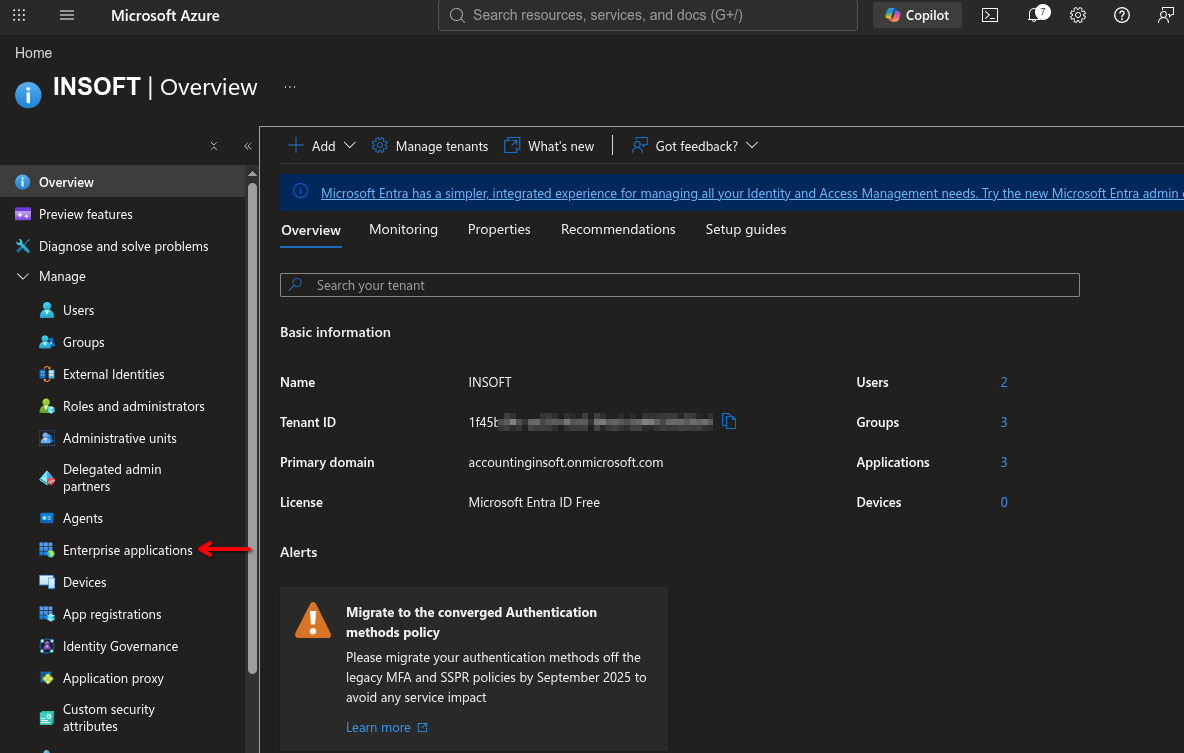
- In the Entra ID left menu, expand Manage and click Enterprise applications.
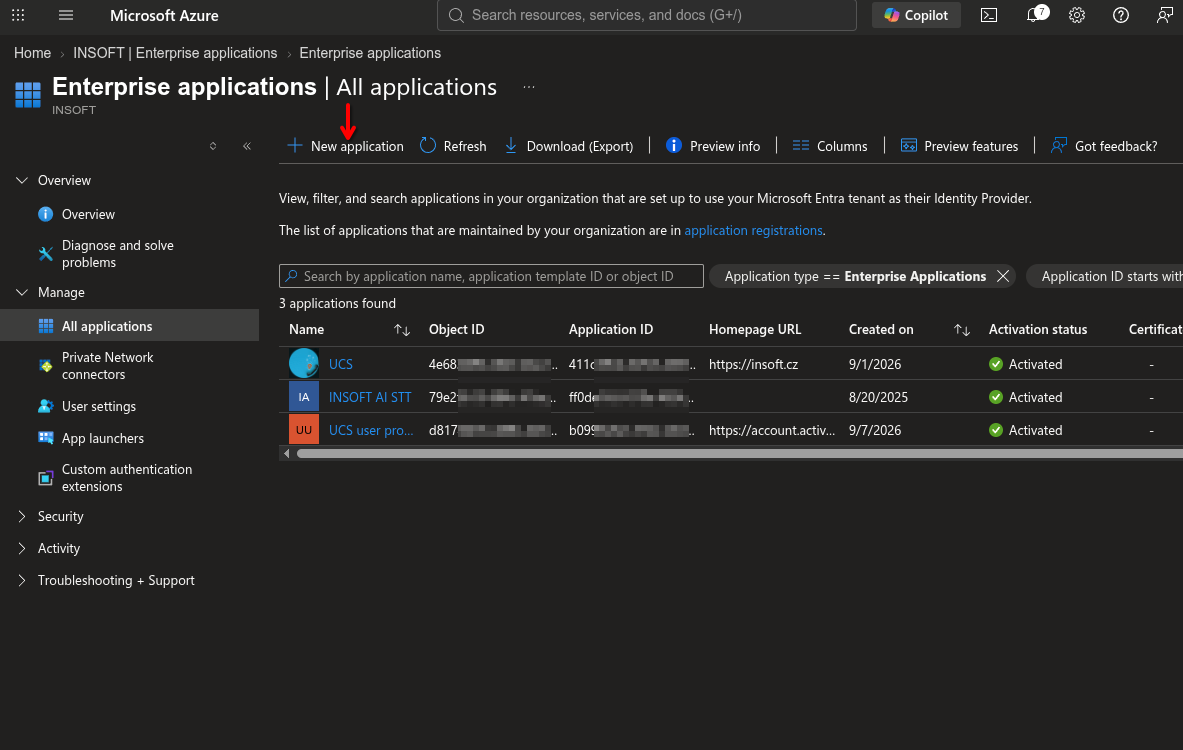
- In the top menu, click + New application.
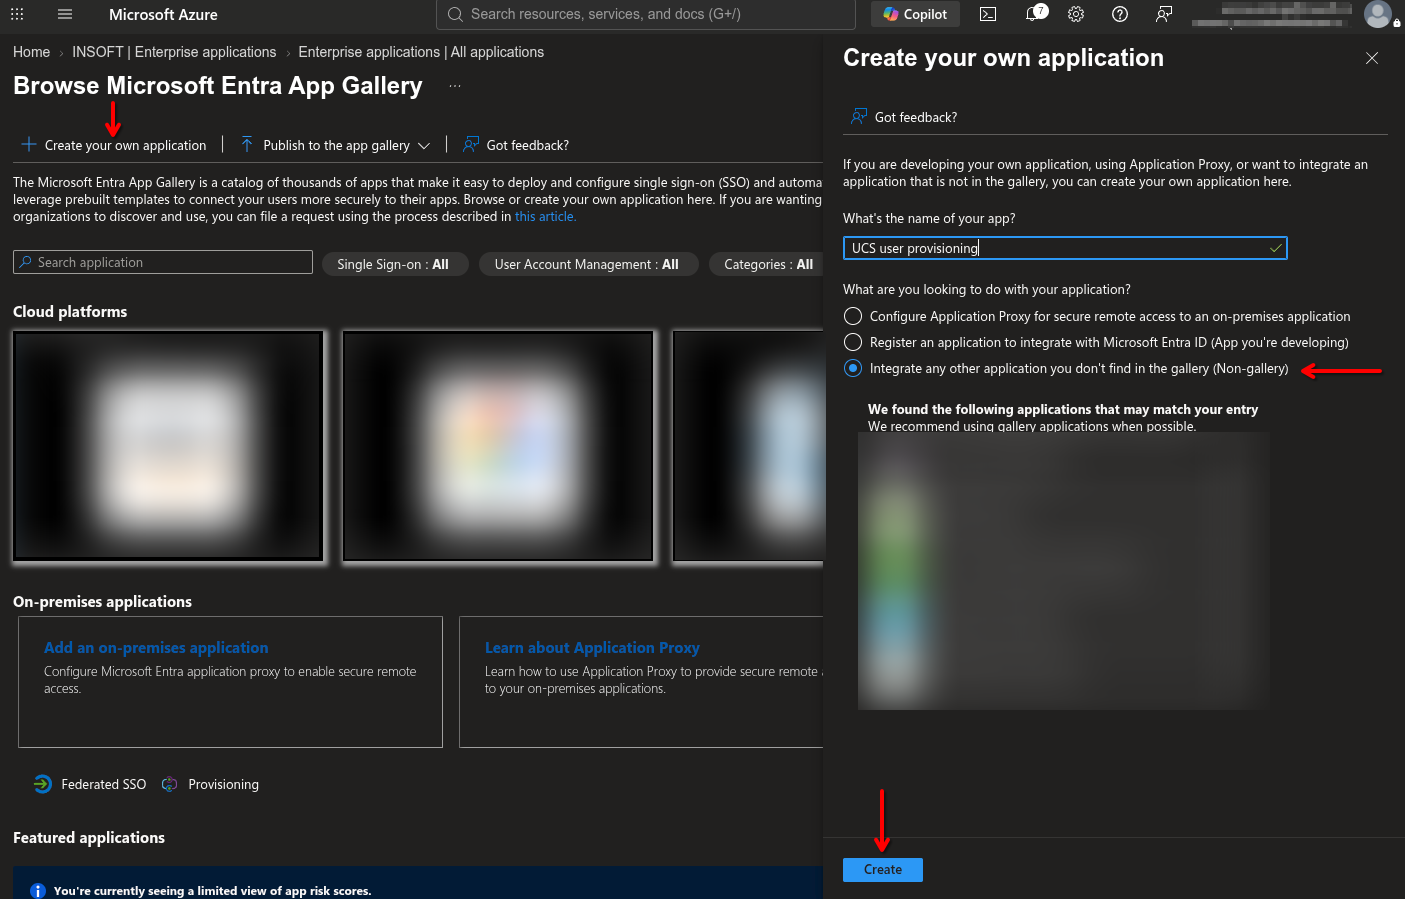
- In the top menu, click + Create your own application.
- On the right, enter the application name, e.g. UCS user provisioning, leave the option Integrate any other application you don't find in the gallery (Non-gallery) selected, and click the Create button at the bottom.
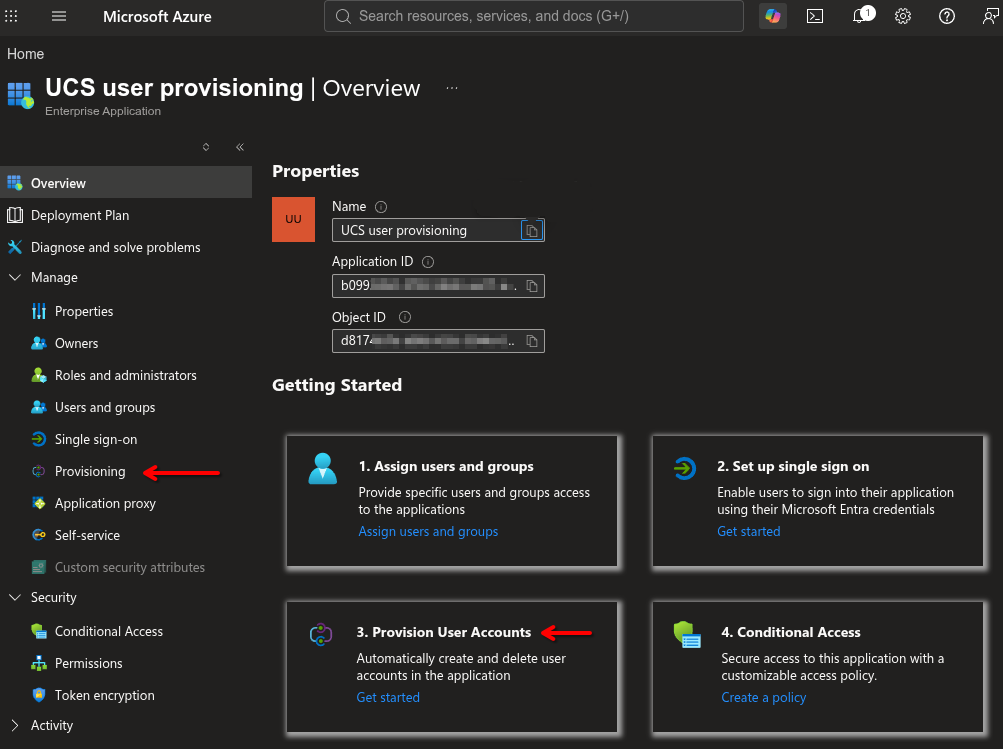
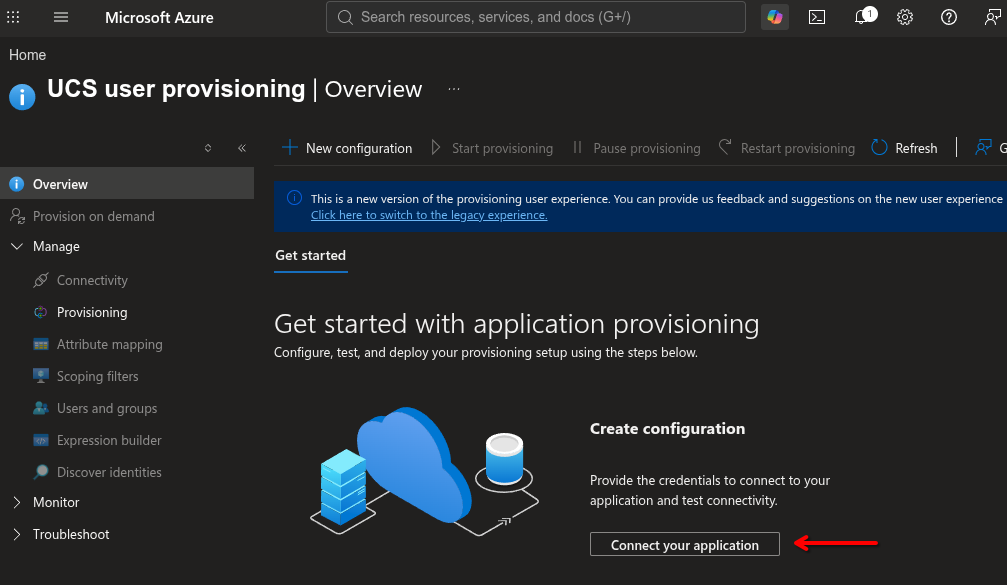
- In the Enterprise Application left menu, in the Manage section, click Provisioning (or use the shortcut 3. Provision User Accounts - Get started).
- In the main section, click Connect your application.
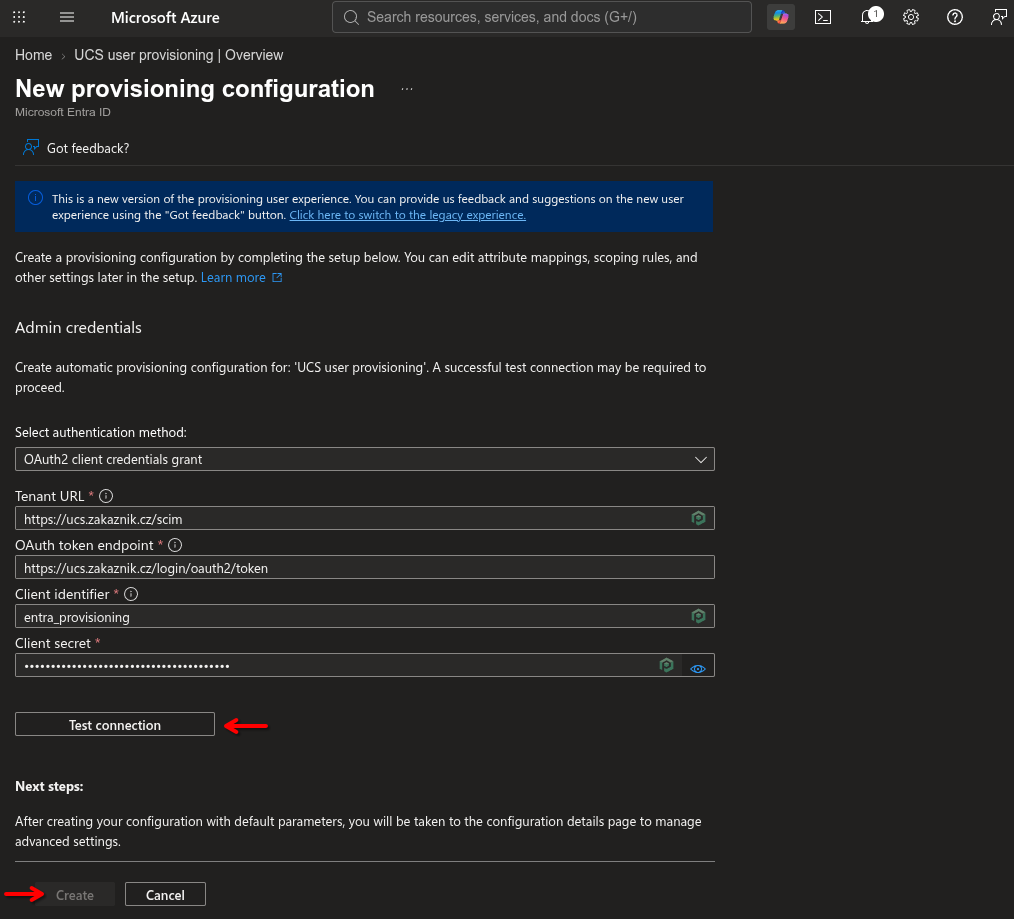
- In New provisioning configuration, set:
- Select authentication method: OAuth2 client credentials grant
- Tenant URL: https://ucs.zakaznik.cz/scim
- OAuth token endpoint: https://ucs.zakaznik.cz/login/oauth2/token
- Client identifier: UCS username of the integration user from step 1
- Client secret: UCS password of the integration user from step 1
- Click Test connection.
- After a successful test, click Create.
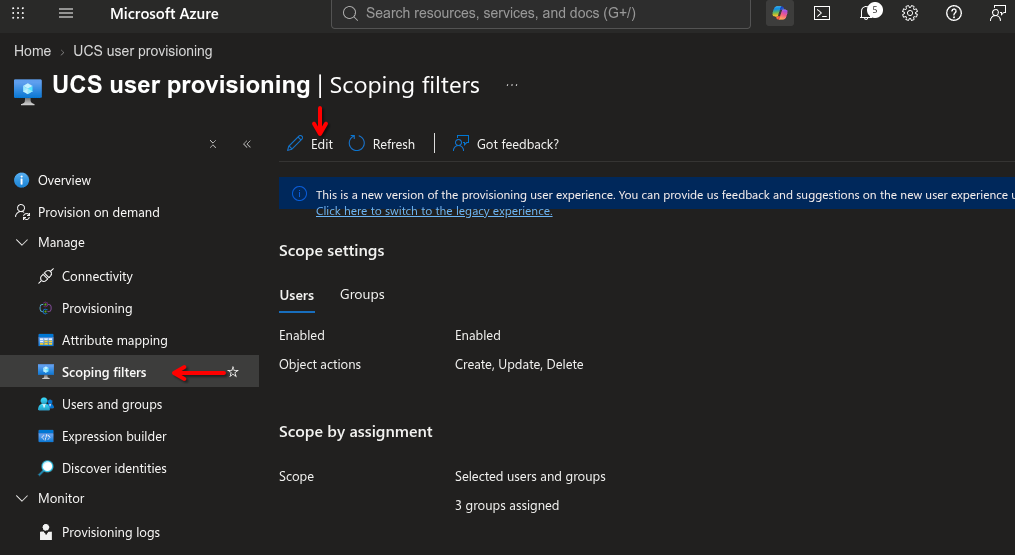
- In the Provisioning left menu, in the Manage section, click Scoping filters.
- In the top menu, click Edit.
- In the Enterprise Application left menu, in the Manage section, click Users and groups.
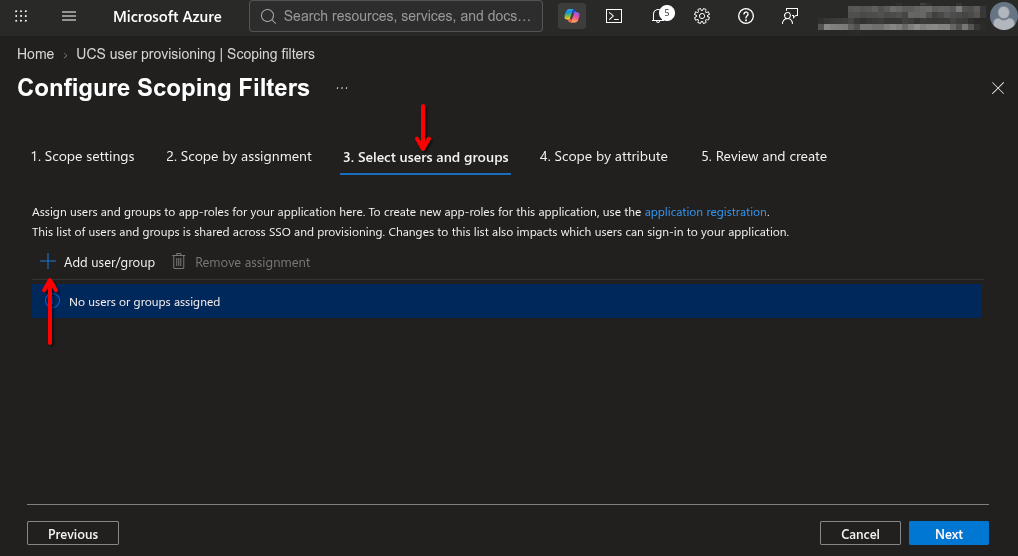
- In the top menu, click 3. Select users and groups.
- Add the individual groups by clicking +Add user/group; these groups control whether a user has permission to use UCS. These Entra ID groups will be synchronized into UCS as roles. Do not add individual users — they will be added based on their membership in these groups.
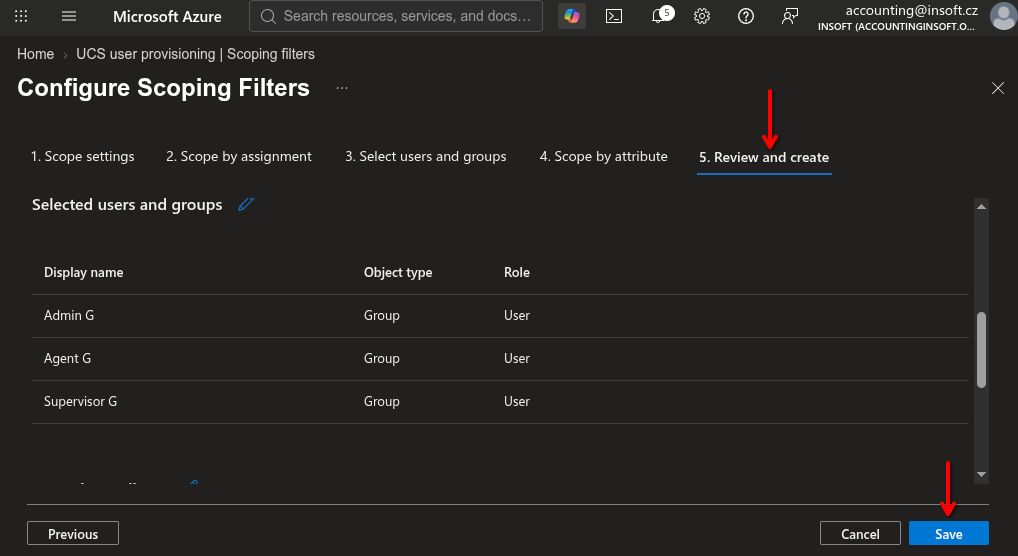
- In the top menu, click 5. Review and create.
- Click Save at the bottom right.
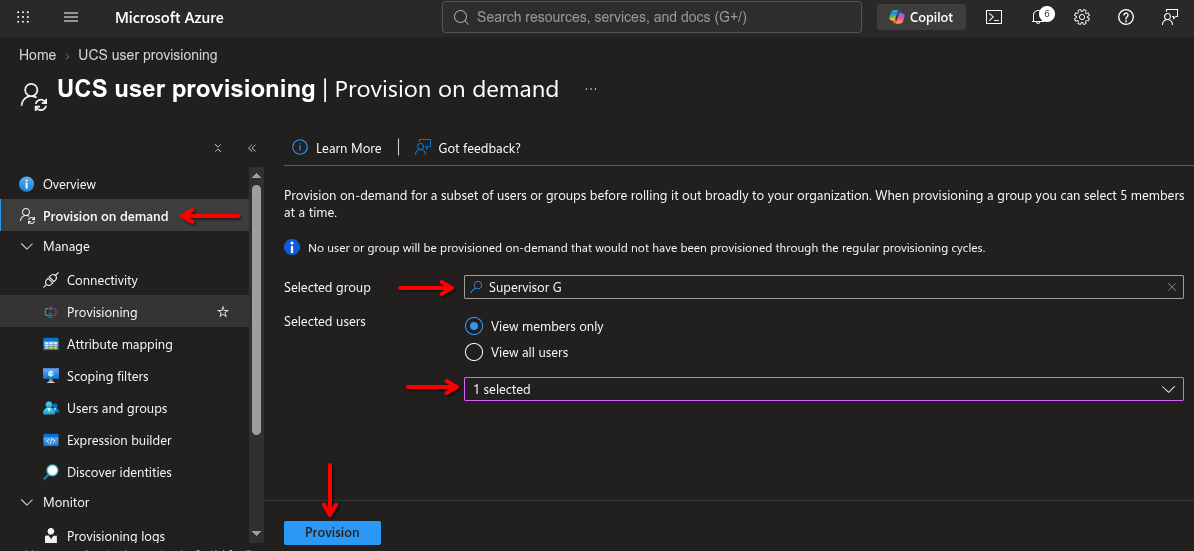
You can now test the synchronization: in the Provisioning left menu, click Provision on demand, type the group name into Select a user or group and select it. Then, in Selected users, select the users for whom you want to trigger synchronization and click Provision at the bottom right.
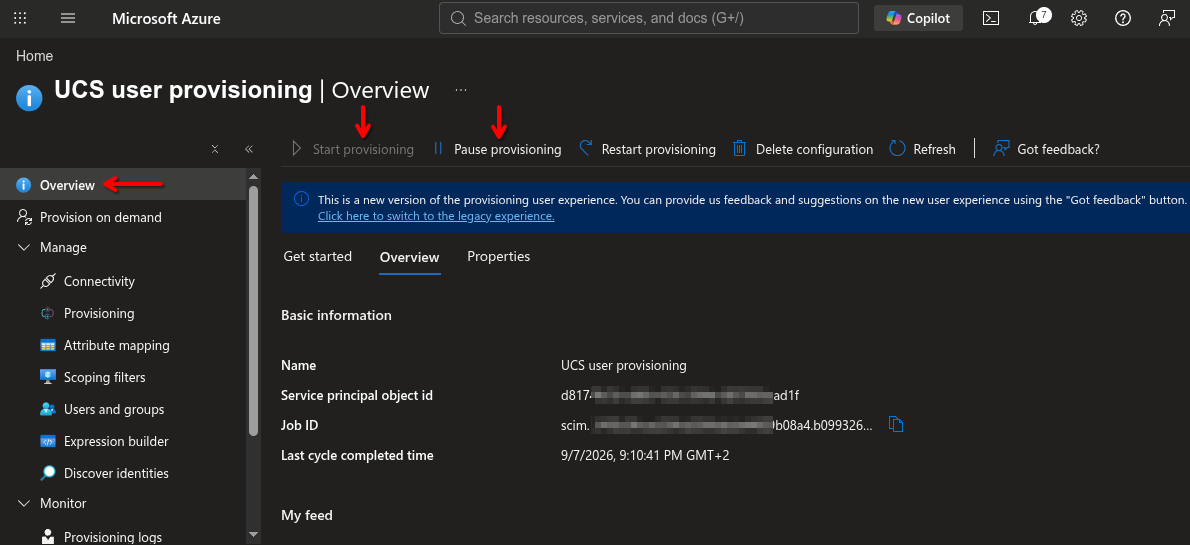
Whether synchronization is active is set in the Provisioning left menu — click Overview and choose Start provisioning or Pause provisioning. Once synchronization is started, an initial synchronization is performed, and Entra ID then synchronizes approximately every 40 minutes thereafter.
Selecting the enterprise application:
Adding the enterprise application:
Enterprise application parameters:
User provisioning settings:
Linking Entra ID with UCS:
Connection parameters:
Selecting the synchronization scope:
Specifying the groups for synchronization:
Saving the synchronization scope:
Manual synchronization verification:
Starting and stopping automatic synchronization:
Changes
If existing, manually created user accounts in UCS are to come under IDM management, a manual intervention in the UCS DB is required:
BEGIN;

UPDATE users
SET data = jsonb_set(data, '{scim_source}', '"scim_username"')
WHERE username NOT IN ('admin', 'insoft');

UPDATE roles
SET data = jsonb_set(data, '{scim_source}', '"scim_username"')
WHERE id != 1;

COMMIT;
The integration username identifies the IDM source with which the created user accounts are linked. If this username changes, the managed user accounts for the given IDM will no longer be visible, and a manual intervention in the UCS DB is required:
BEGIN;

UPDATE users
SET data = jsonb_set(data, '{scim_source}', '"new_scim_username"')
WHERE data->>'scim_source' = 'old_scim_username';

UPDATE roles
SET data = jsonb_set(data, '{scim_source}', '"new_scim_username"')
WHERE data->>'scim_source' = 'old_scim_username';

COMMIT;